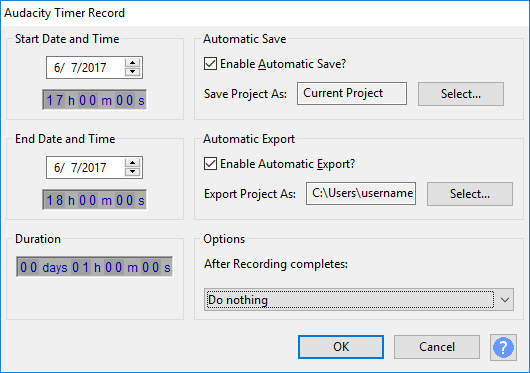
You need to manually set it up audio/video recording. But, there is also a way to schedule a recording using a digital video recorder or cassette. Timer record is similar to these, as it is used to schedule recording. You can set up the start and the end of the recording using the Timer record setup dialog box. It can also automatically save the project after recording. As well, it can also be set to a particular format to be exported after recording. You can also set up the closing of Audacity software or shutting down of the computer after a recording by the Timer record is finished.
- Sponsored Links -

Set up Start and end time
The start time of the recording is set to the current time by default. If you don’t change that, it will start recording by default on the current date and time. For the end time, there is no default value. You need to set the end time either by picking the date and time, or by selecting the duration of the recording.
Save or export the project after recording
There is a checkbox to automatically save the project. You can select the path or folder of the location to save the file after the recording is completed by checking the box. The automatic export button allows you to choose the location and the format under which you want to export the file after the recording finishes. Click here to learn more.
After the project is saved
After the recording is completed, and your file has either been saved or exported, you can select different options. These options include closing Audacity, which will close the Audacity software.
- It will show an error dialog box in closing if the changes are not saved. The other option is to shut the computer off, which will show an error if any other background app needs any operation.
- Another option is to Restart the system, restarting the computer. This function is only available for the Windows operating system.
- The do-nothing option can be selected, if you want to just save and leave everything as is.
- When the recording is completed and you have set any of these options, A dialog box appears for a minute to allow you to cancel that operation.
- After one minute, if you have set it to shut down the computer, it will do accordingly.
It means that whatever option you have set will be performed after completion of that one minute.
Cancel the scheduled recording
After setting up all these functionalities, you can press OK, which starts the recording immediately or as scheduled in the start time of Timer Record. This can be canceled at any point in time before the recording commences.
- If the start time is set to the current time, it will show a ‘waiting to start’ dialog box, you can press Cancel to cancel the recording.
- Then, when the recording starts, a Timer Record dialog box appears which has a stop button to stop the recording at any point in time.
- Enough space should be available on the disk to save the project, otherwise an error dialog box will appear showing that the disk space is insufficient.
Also, you can only use a timer record when the last project changes have been saved. Only a clean project can be used for the Timer record.
Read more articles.


