Analyzer Function: Audacity is definitely a great tool for recording audio and tracks. You can easily record, edit, customize and play your audios and tracks with our program. It provides various additional features to enhance your audio. There are immense tools to help you improve audio quality and sound to your liking.
- Sponsored Links -
It sharpens your recordings and removes unnecessary noise and disturbances. Various tools and effects at Audacity can help you cut, edit and merge your tracks. You can apply effects to an individual track or to multiple tracks. Also, you can also add and remove audios from your tracks and recordings.
Using Audacity
Using Audacity is very simple. But even if you have any problems whilst using it, we provide you with helpful services that contain all the related information. It carries all the details about each and every feature that you need to know. From its use to its application, everything is easily available via Audacity’s help website.
Apart from the recordings, Audacity also provides you the option to enhance and improve your work page, by allowing you to customize the look of your workspace. It is very easy and simple too. One feature at Audacity is the Analyzer function. If you are using it for the first time or don’t know how to use it properly, the basic steps that you need to know are below:
What are analyzers used for?
Analyzers help you analyze your audio. It does not help you create or change the audio, but helps you to analyze audio instead. Similar to other features in Audacity, it is very easy to use. It helps you find out everything about your audio. There are three inbuilt tools at Audacity including contrast, plot spectrum and find clipping.

Plugins in Audacity analyze menu
You can place plugins in Audacity analyze menu that accepts input audio but does not produce output audio. There are six types of plugins that can be added in the Audacity analyze menu. These include:
- Regular interval labels
- Beat finder
- Sample data export
- Vamp analysis plugins
- Sound finder
- Silence finder
Analyzing amplitude and other audio properties
- Using analyzing tool you can determine the contrast of the volume by determining the average RMS difference in volume between the foreground speech and the volume in the background.
- You can find the clippings using this tool. This feature displays clip samples in label track as screen- reader which can be used as an alternative to View -> Show clipping.
- Along with these, it has a feature called plot spectrum. This helps you convert any selected audio into a graph that has frequency against amplitude.
Dividing Sounds and silences
Using the analyze tool, you can divide the sounds and silences using some labels. Silence finder helps you in dividing areas of silence by labeling them. And, sound finder helps you in dividing sound by labeling the areas of sound.
Marking beats
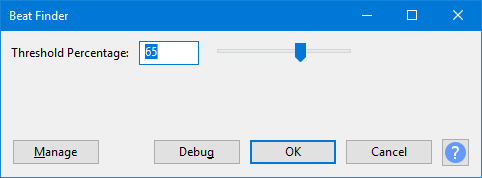
Lastly, you can also use labels to mark beats. For this, the beat finder is used to place some labels at the beats that are louder than the whole audio. It is a rough tool so it might sometimes fail in working well. You can reduce the threshold percentage to improve it. Click here to learn more.

Read more articles.


