Do you have an interest in songs or audio? Well! Do you know about Audacity? It helps you to record and edit audio with the best features ever. You can make ringtones, transfer tapes, mix stereo tracks, split tracks, and do countless other things.
- Sponsored Links -
If you are a beginner in recording your voice, you will definitely be a bit nervous when starting out. However, Audacity is the best and friendliest tool that aids you throughout your journey. As a novice in this field, it is common to make mistakes. But, guess what? Audacity lets you undo your actions.
While you are recording your audios or editing them, you can undo your actions anytime. You can even redo them if you feel that the earlier version was better. You can use Audacity very freely. You need not worry that your one action can ruin whole your hard work. Trust me, with Audacity this will never happen!
Undo is unidirectional
This means that if you commit, for example, 5 edits and then undo to reach the third edit and create a fourth additional edit, you will no longer be able to undo the original 5th edit. Therefore, you can only move in one direction while working with the ‘Undo’ feature.
Until when?
You can only utilize undo or redo whilst your file is open. That is, you can traverse through and make use of all the history before you close the window. The moment you close the window, all the search history gets lost and you cannot access it again. This also means that once the window is closed, you cannot revert back to the original file in any way.
How do you Undo?
There are four different ways in which Audacity allows you to undo your actions or edits. These are as follows:
- At the top of the window, you will see the ‘Edit’ drop-down menu. Go there and you will find these two options there- ‘Undo’ and ‘Redo’. Just click these buttons to perform the expected task.
- Toolbar always contains the short-cut buttons for different features that any application has to provide to its users. The ‘Edit’ toolbar contains direct buttons to undo and redo your edits and records in the original track audios.
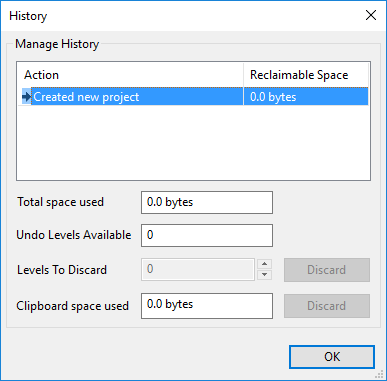
- Just go to ‘Menu’. Then to ‘view menu’. Click on the ‘History’ button to surf through the whole history of the action. Look for the action till which you want to undo your tasks. Simply click on them and you will reach the selected state of your file.
- There are different keyboard shortcuts for many features. These are generally different for Windows, Mac and Linux users. Search for the keyboard shortcuts for ‘Undo’ and ‘Redo’ and use them!
History Window
While you are still working with your edits, and enhancing even the most precise vocals, you can see the history anytime. You can go through all your edits’ history at a single place, anytime, in the ‘History Window’. One remarkable thing is that you can perform this infinite times. This means that you can perform a large number of edits and then can easily undo them. You can even finally reach the original version of the audio track.

You can reach the history window easily through the view menu. It shows you all the actions and edits, you have performed after opening the project. You can manage them and can even discard the steps. You can delete the action history which you don’t want to see. Maybe you wouldn’t need it! So, you can easily delete it. After you manage all your actions history, undo or redo actions, finally, click on the ‘OK’ button. This will save it for the future.
Read more articles.


