
Recording your audio is an essential feature of Audacity. You can easily control your recordings of audios and tracks. Here is the tutorial to various recording commands, take a look!
- Sponsored Links -
Configuring your device to record the audio
Obviously, it is very important to set up your device with Audacity to be able to record your tracks and audios.
- To set up the device, connect your device with your PC and verify all the connections properly.
- Select any one source to record and put it in Audacity. Set the recorder and start recording your audio.
- You can also listen to what you have recorded using the sound control panel on the screen, or by click using Software play-through.
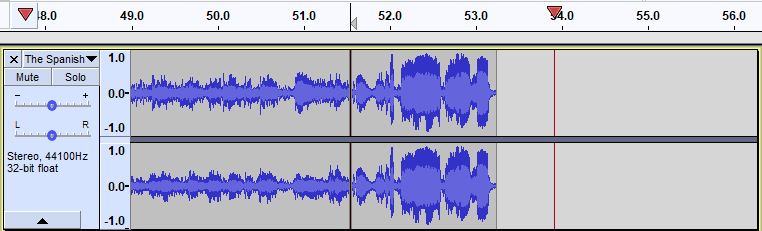
Recording in the same track
You can record tracks in Audacity after the end of a selected track. The record button is easily available in the Transport toolbar. No need to worry about your previous audio when you record a new track or audio in Audacity, as it will mark the place of the junction. You can also remove this mark if you want.
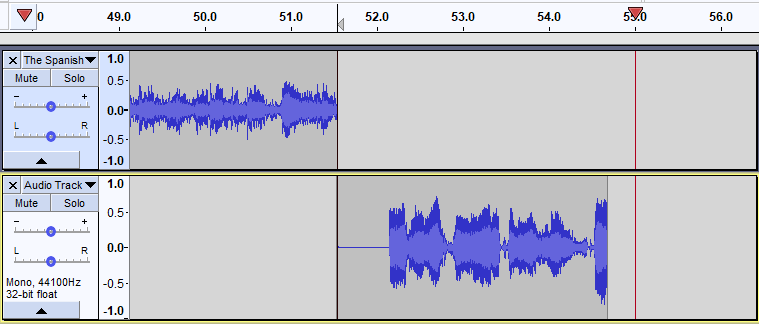
Recording new tracks
Recording is an elementary feature of Audacity. If you have already used it, then you might know that it is very easy to record audios and tracks on Audacity. In case you are using it for the first time, then here is the complete tutorial for you:
- You can start recording new audio by pressing the Shift key with the R button.
- Also, you can click on the Shift button below the Transport toolbar to record a new track.
- You can also click on the skip button to start recording from the beginning. And, the stop button will help you stop the recording.
- If you want to stop your audio recording for some time, then no need to press the stop button.
- You can just click on the pause button and resume recording whenever you wish.
- You can also record a specific region in Audacity. For that, you select that specific region and start recording.
Recording audio for a fixed time
If you want to fix the recording time for your audio, you need to select a particular region or choose any specific time range. After this, you need to long-press Shift key with Record New Track button. As soon as you click on the recording button, it will record for the set time range.
Preparing Audacity for Recording
You can prepare Audacity for recording by clicking the Pause button or the Recording button. In addition, you can use pause shortcut, the ‘P’ key or the recording shortcut, the ‘R’ key. This will help you prepare the application for recording. Click here to learn more.
Detecting dropouts
You can visit the Detect drop outs option to enable Audacity to find all the small skips that you made in the Audio. This has been introduced recently and is again a great feature at Audacity. This is very simple and easy to use.
Read more articles.


